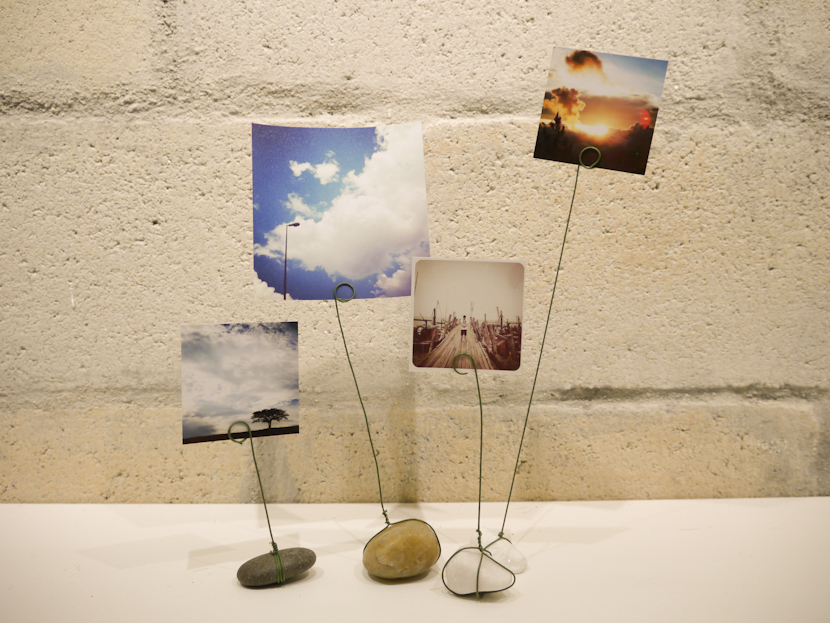
Family is a big thing for us at Stories and quality time with family is something that we want to keep advocating. Sometimes, this can mean doing a simple and fun activity together! Here’s an oldie but a goodie: try making your own photo holder to show off your photos! It makes a great decoration item in the house or a gift for someone.
This literally rocks! ;)
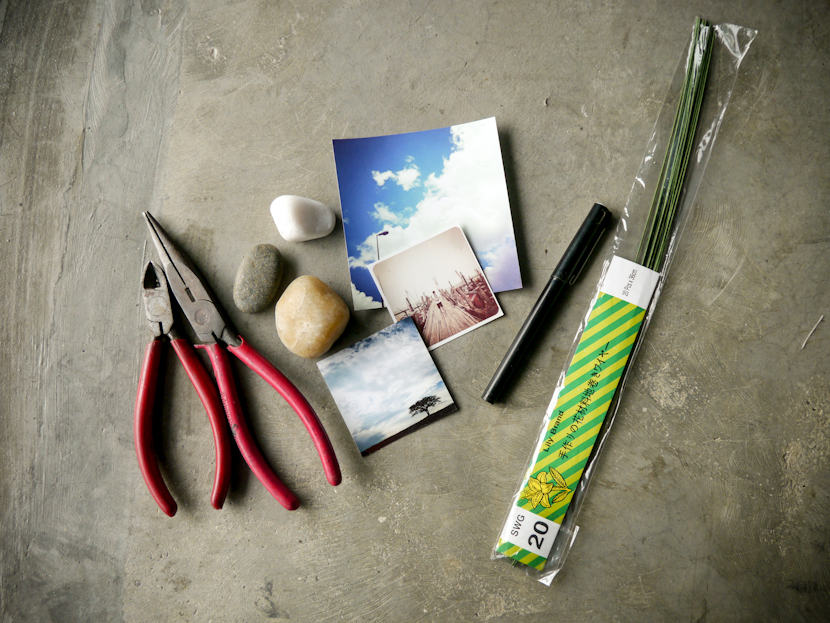
You will need:
– Cloth-covered florist wire sticks (You can get them from your local florist)
– Wire cutter & pliers
– Medium-sized washed pebbles (Make sure they are clean. You know, if you found them by the road side)
– A pen
– Some awesome photos you want to display
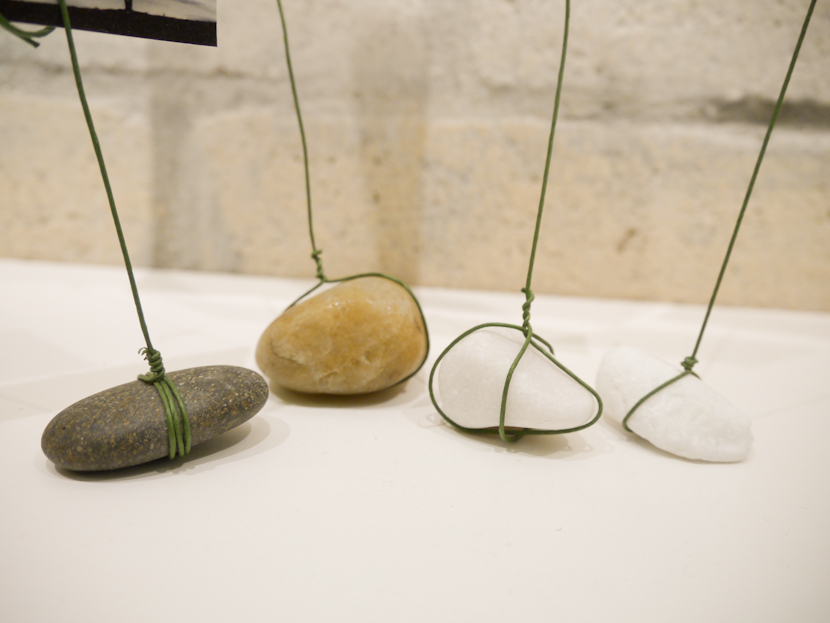
Step 1: Pick a pebble and wrap a wire stick around it. Start from the bottom and coil it upwards.
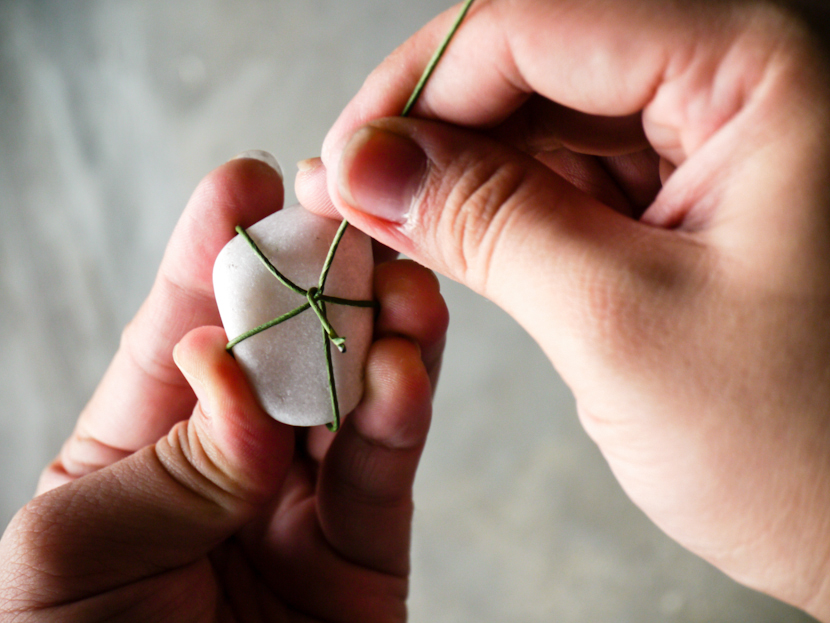
You may coil them any way you like. You can cross tie them, or coil several rounds around them or simply coil around the pebble once.
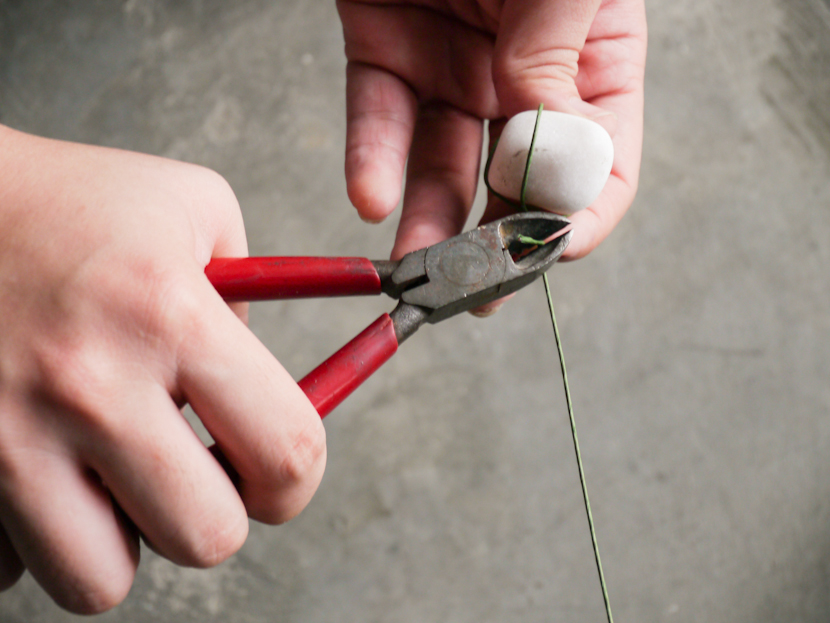
Step 2: Twist the end of the wire securely with the pliers.

Although you can twist them by using your fingers, but let me warn you that your fingers might feel sore after doing that. Yes. It still hurts for me. Sigh!
You may use the wire cutter to snip off the extra bit.
Step 3: Coil the other end of the wire with a pen, like this:
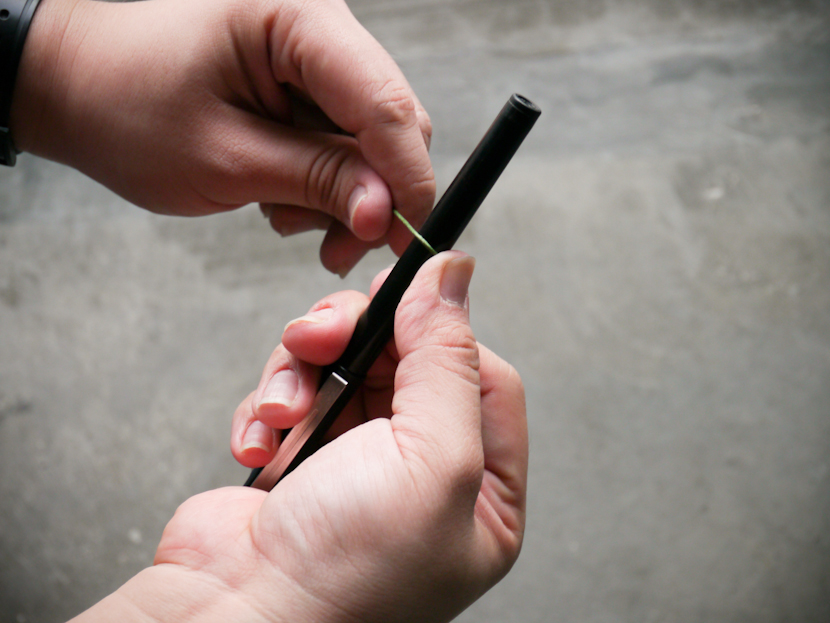
Make two tight loops to create a coil like this:
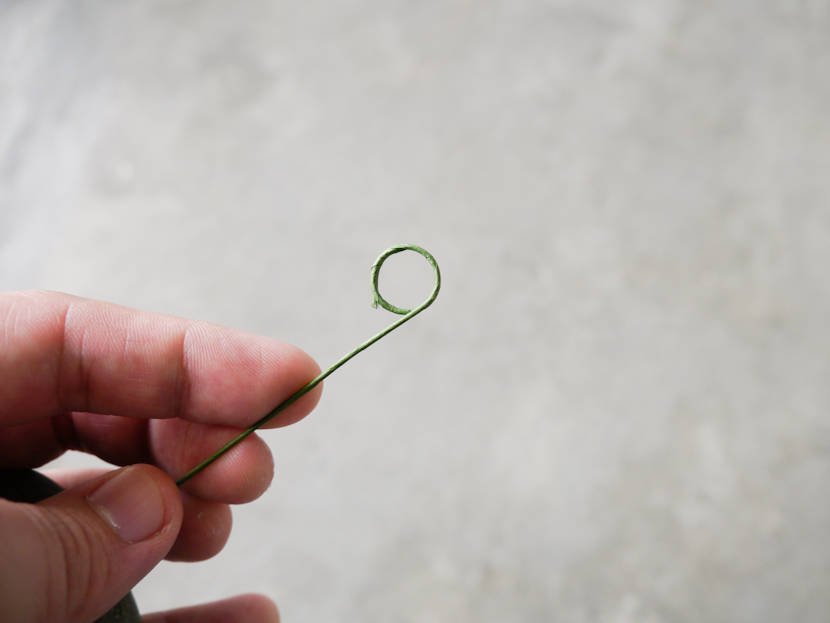
This coil will hold your photo.
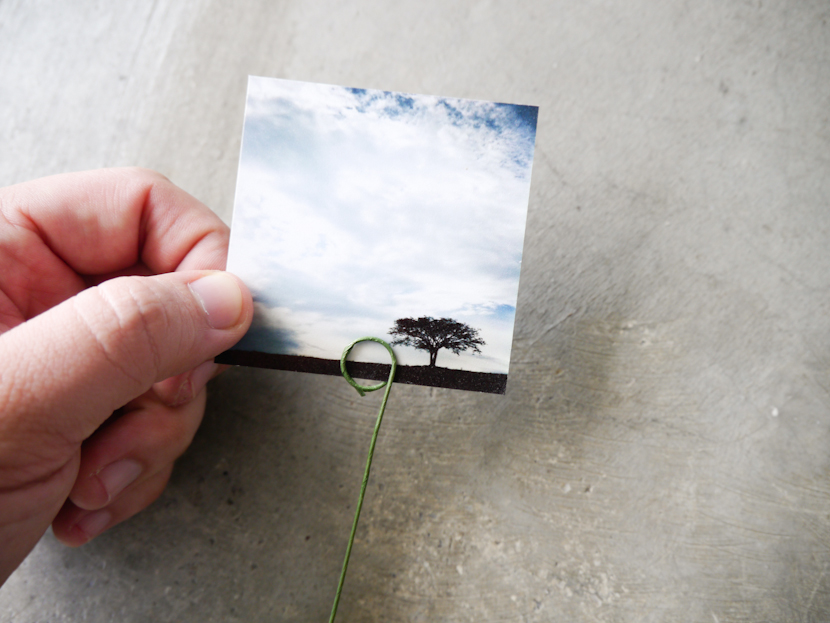
Step 4: Slip your photo into the gap of the coil. And voila! It is ready to go on display!
You can be creative about what you use as your base. As these are flexible florist wires, you may coil them around anything. Here’s one example about coiling it onto a bottle/vase to make flowers look even more awesome!

Enjoy! :)
[Editor’s note: Diane was a previous team member at Stories.my. She loves art and craft and often shared her easy craft ideas with us! This article was recently updated on 11 July 2020]